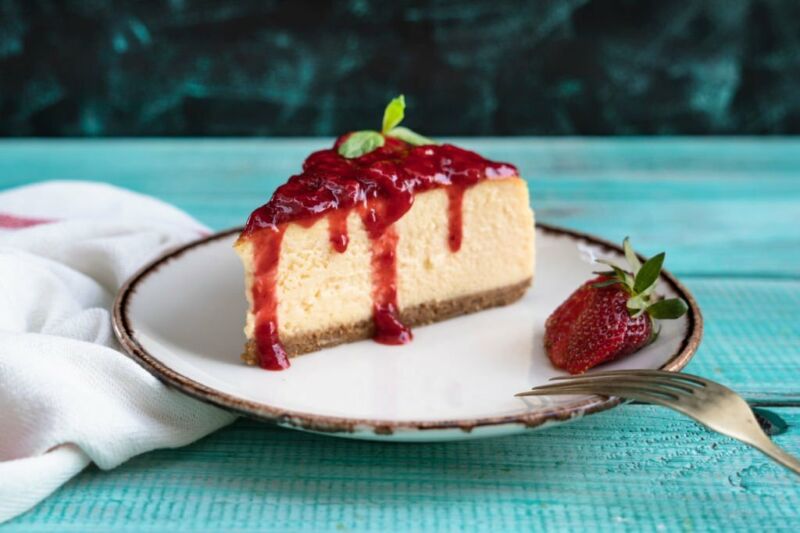
How To Cool A Cheesecake Quickly?
Cheesecake is one of my all-time favorite desserts. That rich, creamy filling paired with a buttery graham cracker crust is simply divine. However, patience is a virtue when baking cheesecake. Most recipes call for chilling in the oven with the door ajar for at least an hour, if not longer. For eager cheesecake connoisseurs like myself, this extended cooling time is pure torture!
If you also wish you could enjoy a freshly-baked slice of cheesecake without the prolonged waiting game, then this article is for you. Below I’ll be sharing some of the most effective methods to cool cheesecake quickly, while avoiding common pitfalls like cracking or compromised texture. With the right techniques, you can have picture-perfect chilled cheesecake nearly twice as fast.
How To Cool A Cheesecake Quickly? Best Method
Allowing Proper Air Circulation for Faster Cooling
One of the easiest ways to accelerate cheesecake cooling is by elevating the baked cheesecake on a wire rack in the first stage after removing it from the oven.
Placing the cheesecake pan directly on the countertop or in the fridge allows the residual heat to become trapped below, creating an insulating effect. The pan itself stays hot for a prolonged period, which slows down the cooling process.
By setting the cheesecake pan on a wire rack instead, air can freely circulate underneath to carry away heat more quickly. Just be sure the rack is sturdy enough to handle the weight of the cheesecake.
Rotating the cheesecake pan 180 degrees a few times as it cools on the rack also helps prevent uneven cooling on one side. I like to rotate my cheesecake every 20-30 minutes for the first 1-2 hours after baking until it reaches room temperature.
Creating an Ice Bath for Rapid Cheesecake Cooling
Another cooling method that utilizes air circulation is to create an ice bath for the cheesecake. This involves nesting the hot cheesecake pan into a larger pan filled partially with ice.
The key when using an ice bath is that the ice should not come into direct contact with the cheesecake itself. Simply surround the cheesecake pan with ice to draw out heat quickly from the sides and bottom.
As the ice melts, refill the outer pan with fresh ice as needed to maintain the temperature contrast. Check frequently and remove the cheesecake once cooled to room temperature to avoid over-chilling.
An ice bath can cut the total cooling time nearly in half compared to air cooling alone. Just take care when moving the cheesecake pan in and out of the ice bath, as quick temperature shifts can lead to cracking.
Harnessing Air Flow from Fans
For the fastest cheesecake cooling results, you can utilize increased airflow from fans or open windows.
Placing the cheesecake near a rotating fan is an easy way to accelerate the cooling process. Rotate the cheesecake every 15 minutes or so to ensure even air flow on all sides.
Similarly, cooling near an open window takes advantage of fresh moving air. Again just be mindful not to rotate or move the cheesecake too frequently, as rapid shifts in temperature or vibration can cause cracks.
I recommend starting the fan or window cooling once your cheesecake has already cooled to room temperature. Going straight from oven to increased airflow can risk temperature shocks.
Refrigerating Fully Cooled Cheesecake
The final step after bringing your cheesecake to room temperature is transferring it to the refrigerator to fully chill and set.
It can be tempting to rush this process by refrigerating an overly warm cheesecake. However, placing a hot cheesecake straight into a cold refrigerator increases risks of cracking substantially.
Always allow your cheesecake to cool to room temperature on the counter first before refrigerating. I like to wait until the center only feels very slightly warm to the touch.
Once cooled, refrigerate the cheesecake uncovered for at least 4 hours up to overnight. This allows the filling to firm up gradually and evenly. Then simply cover and continue chilling for as long as needed to complete setting.
Preventing Common Cheesecake Cooling Pitfalls
Now that we’ve covered some quick cooling methods, it’s also important to understand how to prevent issues like cracking in your hurry to chill cheesecake faster.
Here are some of the most common causes of cheesecake cracking and how to avoid them:
Preventing Cracks from Uneven Cooling
If your cheesecake develops cracks during the initial counter cooling, chances are it cooled unevenly. Rotating the cheesecake pan periodically prevents one side from setting faster than another.
You can also cover the cheesecake lightly with foil, just avoiding direct contact with the top. This helps regulate the rate of cooling for a smooth surface.
Avoid Cracking from Drastic Temperature Changes
Sudden temperature changes are one of the biggest contributors to cracked cheesecakes. Always allow gradual temperature transitions.
Don’t move cheesecake straight from the hot oven into the fridge. Similarly, prevent direct contact with ice during an ice bath. Let cool to room temperature first, then chill in the refrigerator.
Prevent Cracks from Vibration
Excess vibration or jostling during the initial cooling can disrupt the delicate cheesecake structure before it sets.
Once cheesecake comes out of the oven, set down gently and try not to disturb or move it until fully cooled. Even small vibrations like nearby appliances running can cause issues.
Use a Water Bath Crust for Flexibility
Cheesecakes baked in a water bath are less prone to cracking since the moisture prevents the crust from becoming rigid too quickly.
Consider baking your cheesecake in a water bath or “bain marie” to allow more flexibility during cooling. Just avoid water leaking into the cheesecake itself.
Storing and Freezing Cheesecake
Part of the appeal of accelerating cheesecake cooling is getting to enjoy your creation sooner. But chances are you’ll have leftovers. Here are some storage and freezing tips:
Refrigerating Cheesecake
Leftover cheesecake will last 5-7 days refrigerated when stored in a covered container. Any longer and the quality deteriorates.
Press plastic wrap directly on the surface before covering to prevent drying out. Chill at 40°F or slightly cooler for best preservation.
Freezing and Thawing Individual Slices
To freeze cheesecake slices, cut portions before freezing so you can separate them easily. Place slices in a single layer on a pan or plate first.
Once frozen solid, wrap each slice tightly in plastic wrap or foil. Then store the wrapped slices together in a freezer bag or airtight container.
When ready to serve, thaw cheesecake overnight in the fridge. Thawed, previously frozen cheesecake keeps 3-5 days refrigerated.
Freezing a Whole Cheesecake
You can also freeze a whole cheesecake. First freeze it unwrapped until solid, then wrap the entire cheesecake tightly in 2 layers of plastic wrap. Place in freezer bag and store flat in the freezer.
Thaw the frozen cheesecake in the fridge for 24 hours before decorating and serving. Let sit at room temperature 30 minutes before slicing as well for neat portions.
Satisfying that Cheesecake Craving Faster
There you have it – several tips and techniques for cutting your cheesecake cooling time without sacrificing that perfect creamy texture. With the right methods, you can enjoy chilled cheesecake in half the usual waiting time.
Using wire racks, ice baths, and fans accelerates initial counter cooling, while proper refrigeration afterward ensures even setting. Just remember gradual temperature changes are key to prevent cracks.
Treat your cheesecake gently, resist peeking too often, and your patience will be rewarded with smooth, unblemished results. But for those urgent cheesecake cravings, these cooling shortcuts will get you from hot pan to fork in no time!